By Mike Carambat, owner - HomeSpunVR Photography
FOREWORD
Panoramic VR Photography has held my interest professionally for over two years. And as early as 1994 (correct me if i'm wrong) when Apple first introduced QTVR on an OS 8.0 demo CD I was hooked. In those early days I made many efforts to learn to use and display this great way of bringing people "there."
I've seen the technology grow and change over the years, and in my opinion, one-shot techniques in combination with ever higher resolution digital cameras will be the wave of the future in this medium. The brand new 360-One rig from Kaidan is an excellent example of how far one-shot systems have gone. Although I haven't had a chance to test it myself with a high-resolution SLR (nor has anyone else as it is so new and the adaptor hasn't been made yet), I believe it to be a most versatile, lightweight rig, capable of taking the best quality one-shot photos on the market today.
SUMMARY
This article will demonstrate a ONE-SHOT RIG that I have conceived and built from readily available parts. The idea of using parabolic mirrors is a VERY old one, and I have seen many iterations on the theme. However, with my version, I have addressed several problems that are common problems with the other versions. The only drawbacks are it's size and weight. If you're not willing to be toting around an unwieldy 20 pound monster, get the Kaidan rig :)
Due to a very busy schedule, I cannot provide any more detailed specifications or advice on this project. I must leave you to your own devices to build it yourself. This information is provided for the benefit and amusement of the VR community.
HERE'S THE THEORY (WHY DO THIS?)
Here's answers to a few questions you may have about my rig after seeing it for the first time...
Q: Why use a big reflecting surface?
A: The bigger the reflective surface, the less you notice small dust particles and imperfections. In addition, the support rod and camera reflection do not take up as much space as well. Finally, large mirrors are readily available and do not need to be as refined thus they cost MUCH LESS.
Q: Why put the camera on top? Wouldn't it be easier to point the camera up?
A: Nope. Because of the larger and heavier mirror, the camera could not support it on its own, so you would need to do a dual reflection system which involves a secondary mirror. These systems require light to bounce twice as much and pass through twice as many surfaces, thus getting twice as much dust and light artifacting from those surfaces.
Here's another drawback with using a "shooting-up" camera system: The image near the top of the dome isn't as skewed as the image near the bottom edge of the dome, so you tend to get more ground than sky in final workable image. In contrast, by mounting the camera on top and pointing down, you get more sky than ground. In my opinion, people like to look up at a pretty sky more than looking down at their feet, so this was a plus.
One last point: with my configuration, you are capable of blocking light artifacting in the shoot-through glass and adding a 360 flash (see below)
Q: Why use a shoot-though glass? Couldn't you just stick the rod through a skylight mounted to the camera lense?
A: Nope. With the tip of the rod so close to the camera lense, it would be huge and take up too much of the image area. By backing the camera away, it gets smaller so it takes up less space in the final image. My system is setup so that the camera is just far enough away from the support rod nut that the reflection of the camera in the sphere is hidden by the nut.
Also, using this system, you can put ANY type of camera on the rig.
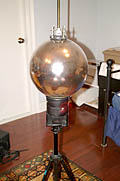 |
VERSION ONE This is version one of the rig (shoot-though glass and camera not shown). This version used a 14" glass gazing ball from a garden supply store. A suction cup device stuck the support rod and camera to the top of it, and a collar mounted the ball to a tripod. Problems with this system were stability, artifacting and the potential of broken glass and camera equipment. These garden balls weren't made for fine optics. It was very difficult to find one without any bubbles, flat spots or distortions. In addition, they fade in reflectivity over time. It served me well for a full year though and I learned alot. Most of the shots at my HomeSpunVR site were shot with this rig. |
 |
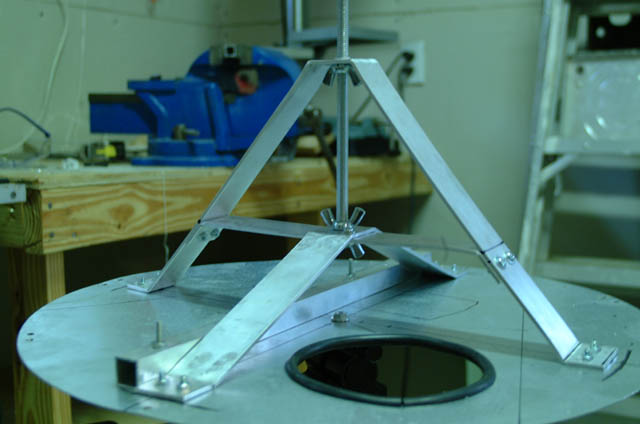
VERSION TWO This is my latest version of the rig. I was finally able to find a decently priced, excellent quality hemispherical mirror made out of scratch-resistant acrylic! I am amazed at the quality of these mirrors. The acrylic is less than a 1/16th of and inch thick (you want your reflective coating as close to the surface as possible) and they really do take a beating without scratching. IN addition, they are completely seamless and imperfection-free. These are the same mirrors used in hospitals to see around corners. I was walking through the maternity ward with my then pregnant wife when I looked up and thought, "That would make a nice mirror." You can get them at McMaster-Carr in many sizes. Do a search for "dome mirror". A footnote, you may see a stainless-steel mirror there as well. KEEP AWAY FROM IT! I was thinking it would have less distortion than the acrylic ones, but they don't. It's very heavy, and very imperfect. I lost some money shipping it back. I ended up with the 18" Acrylic with Galvanized-Steel Back. |
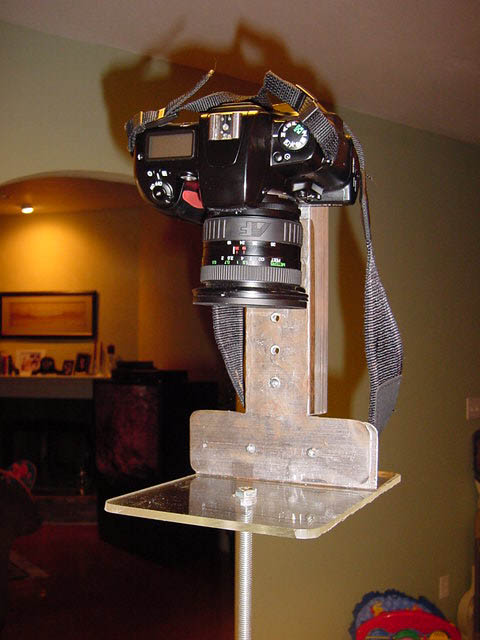 Note that the camera is able move up and down, forward and back and left and right on a sliding aparatus. This allows you to put any camera on the rig. |
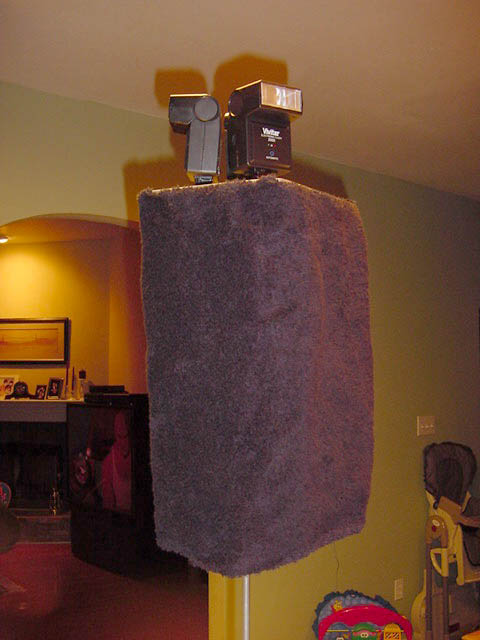 This is the same apparatus, but with the detactable glare cover mounted. The camera is inside. The cover keeps overhead light from reflecting in the shoot-through glass. The 3 flashes above are 120 degrees apart from each other and simultaneously flash out of sight of the hemisphere. |
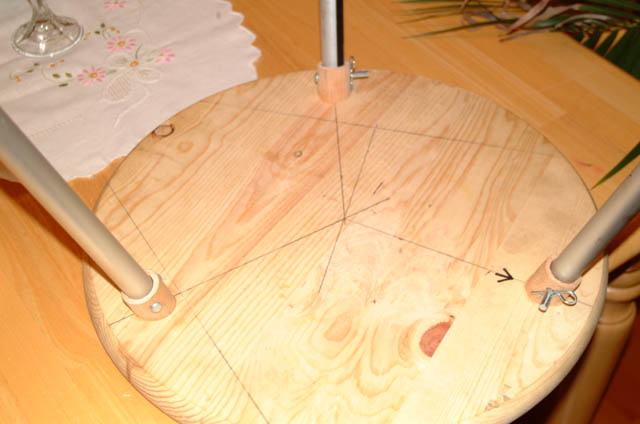
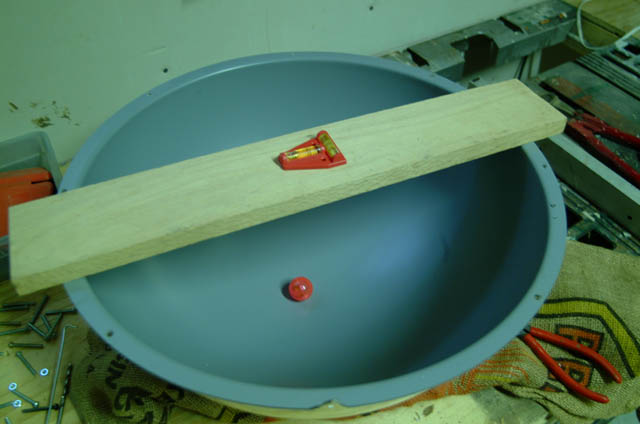 This really was difficult to figure out. You need to find the exact center of the hemisphere to drill the hole the support rod will pass through. I did it with a level and a marble. The support rod doesn't actually attach to the acrylic as it would shatter under the weight. |
 A view under the hemisphere shows the support mechanism which keeps the support rod straight and sturdy. Note the wingnuts and the access hole. This is so the support rod can be quickly removed for easy travel. |
 The stool is what the rig sits on top of and uses tripod legs to adjust it's height. The legs are removeable by pulling out the cotterpins for travel. |
FINAL NOTES
Basically I'm pleased with the system and it's results. With a properly aligned setup I can get a good 120 degrees of vFOV. However, I don't always have time to precisely line up my rig as I shoot very inexpensively. Normal, quickly done setups still however yield around 100 degrees of vFOV (see image processing below).
I'm not really happy with the flash yet. I just made this attachment to get rid of the plague of indoor window flare, and I used very inexpensive flashes to test. I need to find some very light, extremely bright flash(es) for the system. I am considering using ONE Powerlight studio flash, but it is very heavy and it may cause the whole rig to topple over. There may be room under the stool to mount it rather than on top, but I don't know how it'll cast. I'll keep you updated.
The system travels and assembles well. I use a large plastic shop tool chest with wheels and a handle to carry it in. The whole thing fits in the trunk of my car. I've taken it everywhere from beaches to airports and resorts. Besides a few weird looks, setup is smooth and fast.
You'll need a good deal of workshop experience to build this thing. Having a drill press, vice and assortment of pliers and hammers will help. This is not an easy project, but a fun one.
IMAGE PROCESSING
Use the highest resolution camera you are capable of buying. Do not use anything under 3 mega pixels. In fact, I really wouldn't recommend anything other than a digital SLR. One-shot's require ALOT of detail and light. Lighting is very important. Having control over f-stop, film speed and aperature is a must.
When it's all set up, you basically set your timer, lower the glare curtain, steady the rig and RUN! If you're in a crowd and you don't feel like leaving your expensive camera equipment out in the open, you can crouch beneath the stool.
The following was shot with a Fuji S1 Pro Digital SLR. f-stop 16 (larger f-stops are better for detail, but the Fuji introduces alot of noise at higher than 16 in low-light), auto aperature, 320 ISO 304, highest resolution (3040 pixels across).
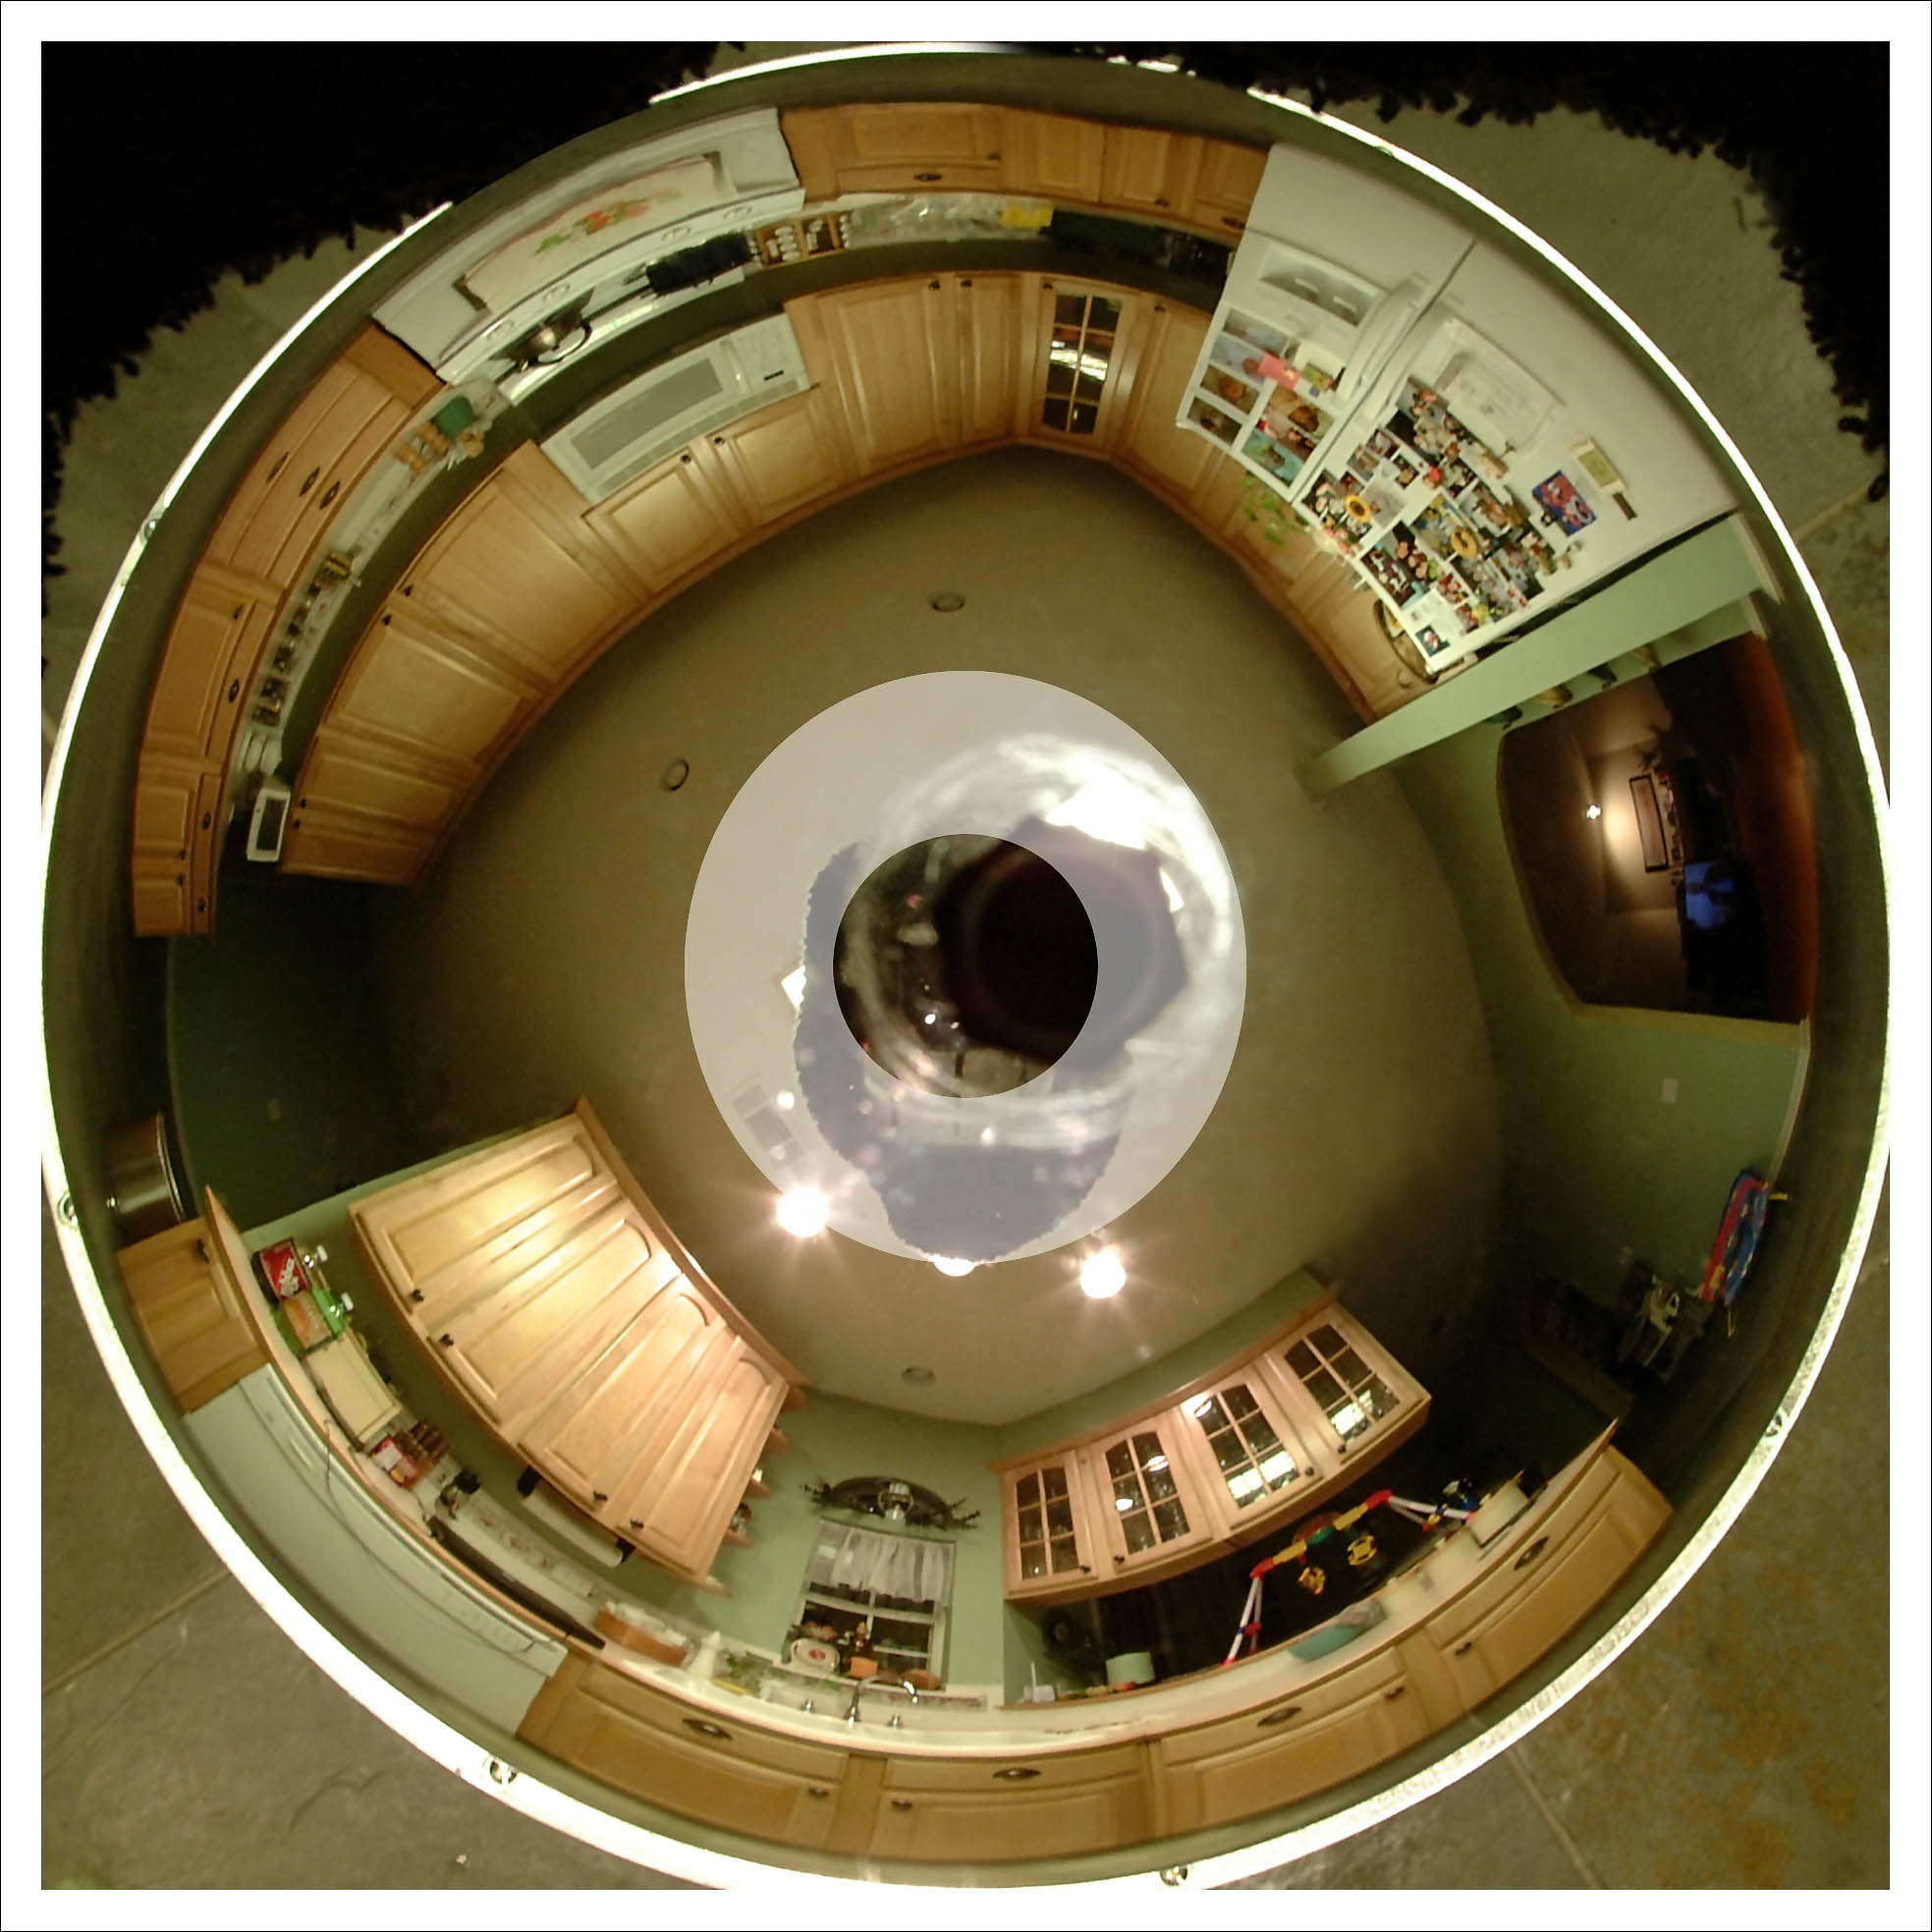 ...after cropping and some photoshop touching up (I have a set of automatic actions which take about a minute or so to run) this is the image you get. By clicking above, I have provided the FULL RESOLUTION version to show you what the system is capable of. I've added some circular markers to illustrate lost area. The innermost circle is what the system is capable of getting when setup precisely. The outermost circle is what is typically lost during normal operation. This is due to reflections in the mirror of the camera and glare cover being slightly out of alignment, thus not hidden by the nut. |
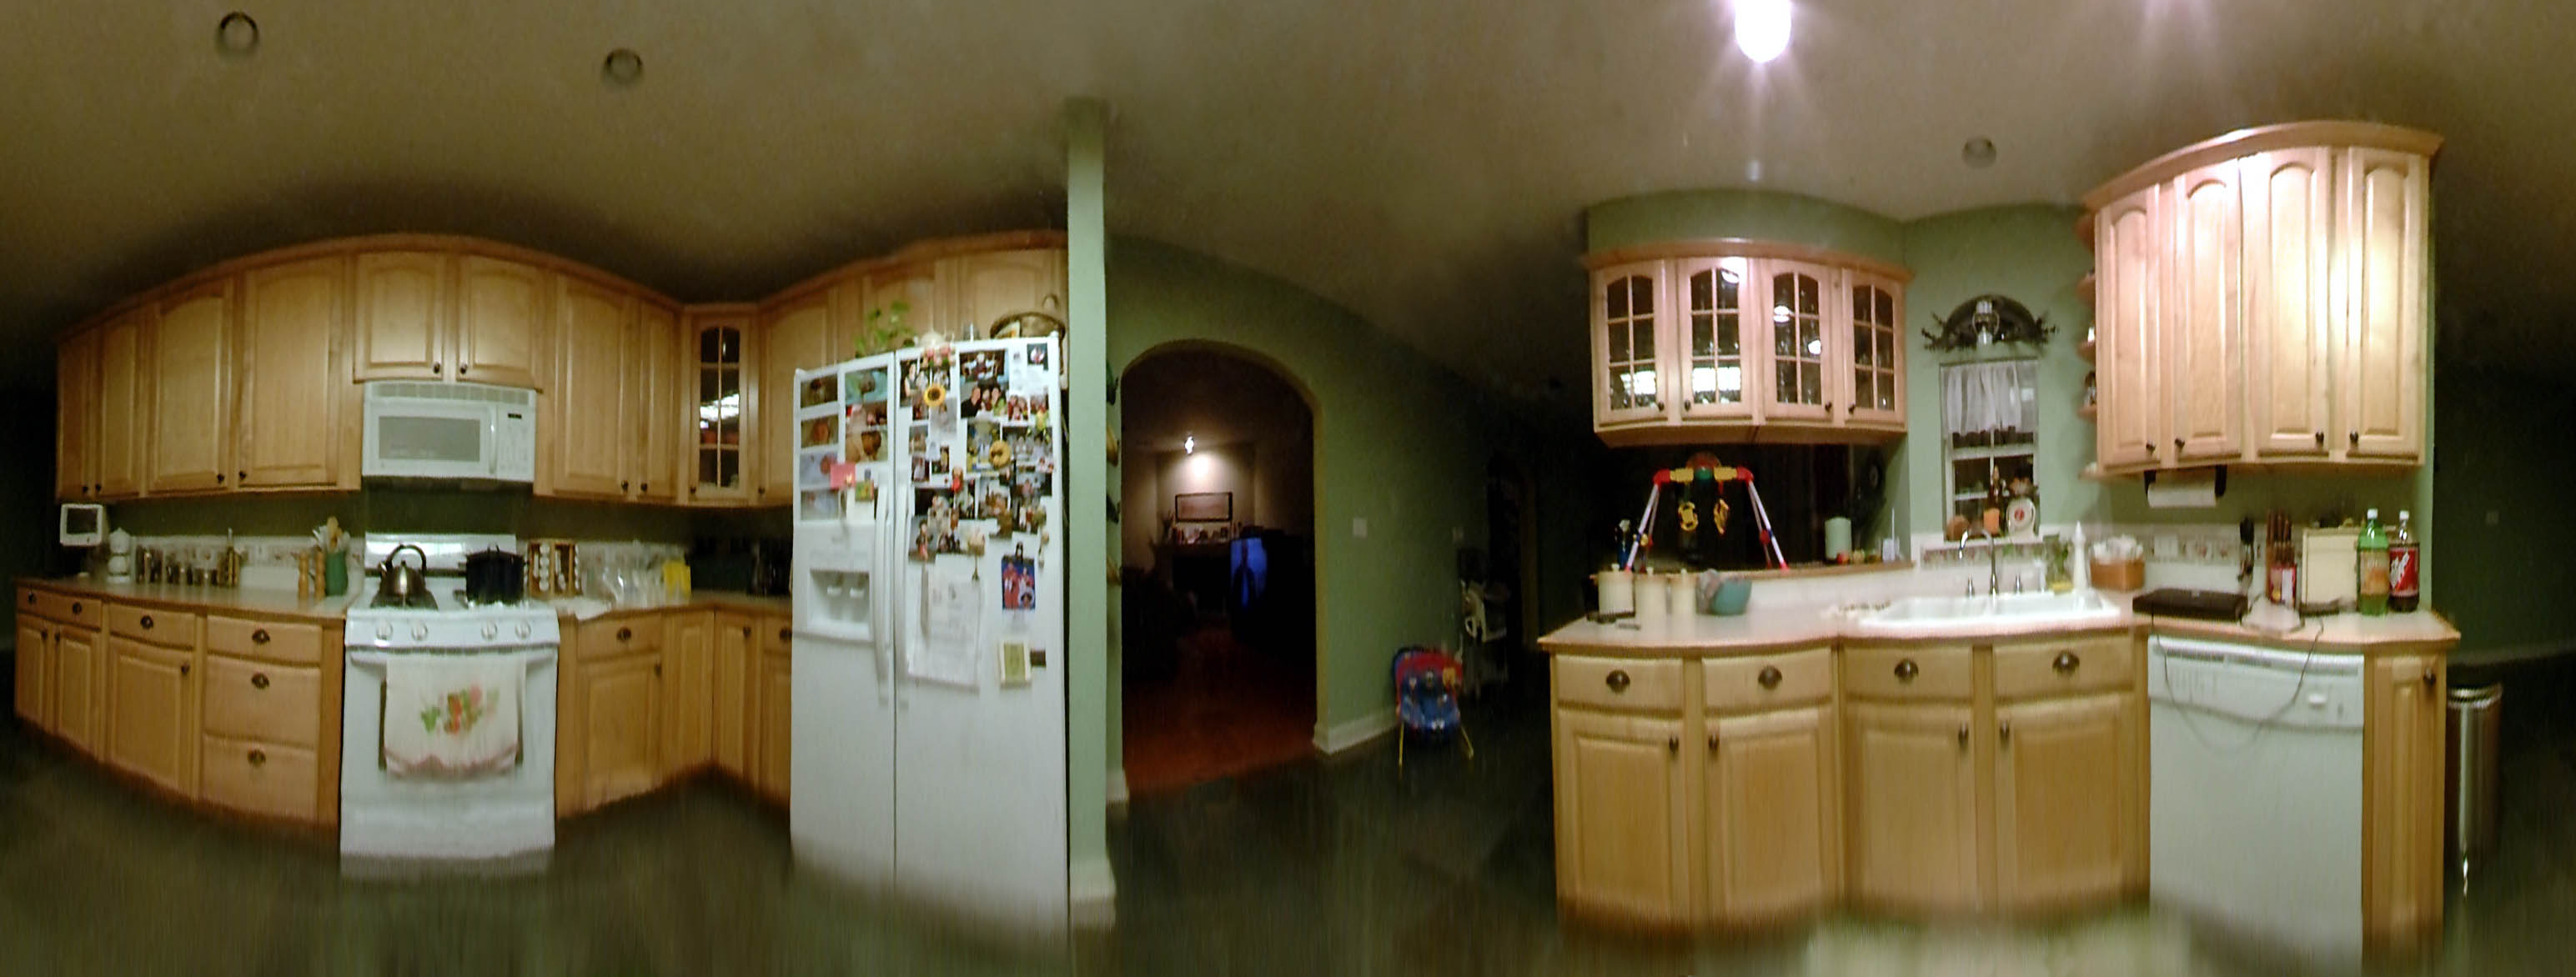 Using Professor Dersch's wonderful REMAP photoshop plugin, you go to this. The FULL RESOLUTION version is provided as well. You'll note some distortion at the bottom. This is normal, and usually doesn't show up as bad in the final .mov file. If it is unrecoverable, you can always crop it out and lose a little vFOV. |
 Finally, I downsample to a very specific size (1512 x 572) and rotate the image counter-clockwise. Then you go to your favorite QTVR conversion tool. I personally use an oldie but goodie called Panomatic. I use 6 frames and jpg compression. I do all this to make a very small file size for web distribution. Click to view (Quicktime required). |
IMAGE PROCESSING - FINAL NOTES
Do as much cloning, spot removal, film grain removal, etc... in the original spherical image. Once it's converted to the panoramic image, those small dots turn into elongated blurs and it's much harder to get rid of them.
I use a photoshop action called ISOx from www.fredmiranda.com which works wonders for removing film grain in low light areas. I strongly recommend it.
Indoor shots are hard. It's best to shoot at night or late evening when the sun outside the windows is not very bright. You get a very small window of opportunity for these shots. If you can, close the curtains or shut the windows. I have had little to no luck doing the under-expose, over-expose dynamic range increase thing with two shots. And again, the purpose here is to do it all in one.
Outdoor shots with this system come out beautifully. Sunlight is of course the best studio light in the world. The only reason I did my above demo indoors is because I didn't have time to shoot one during the day and I had a small opportunity to get this article out.
For much cleaner examples, please visit my website at:
www.homespunvr.com
I would personally recommend visiting the Miscellaneous->Dixie Landin area.
Also, I did a full fledged vr tour in Breckenridge Colorado at: www.dhouse.com
I am especially proud of that one :)
Hope this information has been of some use...
Mike Carambat